My Avatars


Grab my Blinkie

I CT for


Blog Trains


Forums I Visit


Blogs I Love


Networked Blogs
Wednesday, June 22, 2011
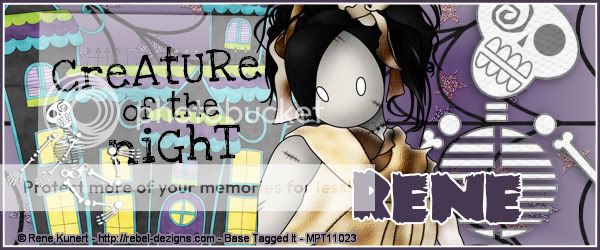
Halloween Zombie

This tutorial was written by me
Any tutorial similar is highly coincidental
This tutorial was written for those who have a basic knowledge of psp
This tuttorial was written psp x2
Supplies Needed
Tube of choice with a close up
Scrap kit - Spooktacular by Cora's Creations which you can buy HERE
Scrap Kit Supplies
cc-candy-01
cc-glitter-starz
cc-skeleton-1,2 or 3 your choice
cc-spider-web-01
cc-haunted-house
cc-wa-03
Lets Get Started
Open a new 600 x 250 transparent image
Choose a light color from your tube for your foreground and a dark color for your background
Choose what kind of gradient you want for the background and add the repeat up to 1
Copy and paste cc-glitter-starz and change the blend mode to soft light
Copy and paste cc-spider-web-01 on your tag
Copy and paste cc-skeleton-1,2 or 3 and arrange it to your liking on the right side
Copy and paste cc-haunted-house on your tag and arrange to your liking on the left side
Copy and paste cc-wa-03 and place it over the haunted house(see mine for help)
Copy and paste your tube and move it in between the skeleton and the haunted house
Click on your gradient layer - selections - select all - modify - select selection borders and use my settings below

Flood fill with a dark color from your tube
Redo that same step but instead of the border being 2 make it 4 and then flood fill with white
Add your name and the correct copyright
Save as Jpeg and your done
Lets do the Avatar
Open a 150 by 150 new transparent image
Flood fill your avatar with the same gradient as before
Resize cc-spider-web-01 and paste as new layer
Copy and paste cc-skeleton-1,2 or 3 - image - mirror - and arrange to the left
Copy and paste the tube layer and move to the right side and arrange to your liking so that both the skeleton and the tube show
Choose your gradient layer and selections - select all - modify - select selection border
Use the same settings as before but put the border to 1 and flood fill with the same dark color
Redo that step but instead of having the border 1 put it to 2 and then flood fill with white
Add the copyright info and your name or initials
Save as a jpeg and your done
Subscribe to:
Post Comments (Atom)
Popular Posts
-
 This tutorial was written by me Any tutorial similar is highly coincidental This tutorial was written for those who have basic kno...
 -
 This tutorial was written by me Any tutorial similar is highly coincidental This tutorial was written for those who have basic knowl...
 -
 Click the preview for Download Stina ::designs by stina:: Tootypup: Tootypup Scraps Anita: Daydreamers Crys: Sinfully Creative...
 -
 This tutorial was written by me Any tutorial similar is highly coincidental This tutorial was written for those who have basic know...
 -
 This tutorial was written by me Any tutorial similar is highly coincidental This tutorial was written for those who have basic knowledge...
 -
 This tutorial was written by me Any tutorial similar is highly coincidental This tutorial was written for those who have basic knowl...
 -
 This tutorial was written by me Any tutorial similar is highly coincidental This tutorial was written for those who have basic ...
 -
 Click the preview for the download Alpha has 4 different colors for each letter HEADQUARTERS
 -
 This tutorial was written by me Any tutorial similar is highly coincidental This tutorial was written for those who have basic knowl...

0 comments:
Post a Comment